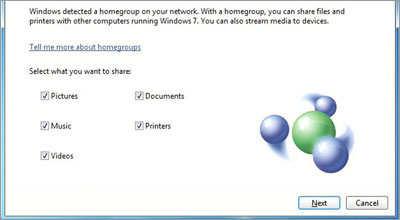
Now that you have a network set up, you can set up a way for everyone to access data on the network. With Windows 7 clients, this is achieved by creating a HomeGroup, a user-friendly way to create a workgroup. A HomeGroup is a group of computers on a home network that can share files and printers. Using a HomeGroup makes sharing easier. You can share pictures, music, videos, documents, and printers with other people in your HomeGroup. Other people can't change the files that you share unless you give them permission. You can help protect your HomeGroup with a password, which you can change at any time. Computers must be running Windows 7 to participate in a HomeGroup. HomeGroup is available in all editions of Windows 7. In Windows 7 Starter and Windows 7 Home Basic, you can join a HomeGroup, but you can't create one.
When a Windows 7 laptop first connects to the network, the user will be prompted to set the current network location. Ensure that the location is set to "Home network" (you can check it in Network and Sharing Center) because HomeGroup only works on networks set to the Home location.
Open up "HomeGroup" in the Control Panel, and then click "Create a HomeGroup." For every Windows 7 client that you want to give access to the HomeGroup, open HomeGroup in the Control Panel of those machines and then click "Join now" (those machines have to physically or wirelessly connected to the network).
During the process of setting up or joining a HomeGroup, you can choose the libraries, printers or files and folders you want to share. (see next step for details).
If you have a network with different version of Windows running, then you are going to create a standard Workgroup. Click Start, right-click My Computer, and then click Properties. In System Properties, click the Computer Name tab. Click "Change," select "Workgroup," and enter a workgroup name. Click OK to apply the change. Do the same thing for all computers that you want sharing data on the network.
0 komentar:
Posting Komentar